Showing posts with label toddler activity. Show all posts

Tuesday, May 22, 2012

Classy Bath Time

I'm back after a long stretch of no posts!  I've been so busy lately.  I started teaching a small toddler "preschool" class from my house twice a week (posts to come soon!) and Olive's 2nd birthday is around the corner, so I've had a lot of things on my plate.  A few nights ago, we decided to relax a little from our busy schedule and have a "classy bath time".   First things first:
  1. I apologize for the grimy look of my tub grout.  It is a very, very old tub, but it's not as dirty as it looks!  :)
  2. I do not condone children drinking alcohol.  We were not pretending this was champagne or alcohol in any way.  We were just having a drink in a fancy glass.  
I set up an battery candle in the corner, for ambiance of course  We also don't normally do bubble bath, but fancy bath time isn't fancy bath time without bubbles!  It also isn't fancy bath time without watered down orange juice in a plastic champagne glass!


Grandma and Olive are doing "cheers".  Everyday after this bath, Olive has been "cheersing" everything in the house.  She and I both had a barrette in our hair today.  She bumped her head up against mine so our barrettes were touching and said, "Cheers!".  


Olive got such a kick out of this.  It was a great way to have some unconventional fun after a few busy, stressful days.  And surprisingly enough, none of the juice made it into the bath water (although the plastic champagne glass turned into a toy after the juice was gone!).  


What are some of the ways that you make bath time fun and/or special for your little ones?

Tuesday, May 1, 2012

Learning with Google Images

While I took a shower the other day, I left my daughter out in the living room with my step dad.  When I got out, I found them sitting on the couch browsing Google Images on the computer.  Olive loves cats, so my step dad had gone onto Google and typed in "cats", then clicked on images.  I stood behind the couch and watched her have fun looking at all the pictures of cats when it occurred to me:  This could easily be turned into a learning experience.  

For example, here is a screen shot of images that come up when you search for "cats" in Google.  You could pull this up and talk to your toddler, asking them questions like:

Where are the cats sitting in cups?  How many cups are there?
Can you find a cat that's smiling?  Is he happy or sad?
Let's count the cats in this picture.  How many cats are there in that picture?
Ooh, I see a cat that's angry!  Can you find it? 
Source: Google Images Search "cats"

Here's another screen shot:
How many cats have their eyes closed?
What color is this cat's hat?
Can you find two cats that look the same?

Source: Google Images Search "cats"

You get the point.  There are lots of things to discuss and lots of questions to ask.  You can search for whatever your little one is interested in - dogs, trucks, vegetables, trains, ladybugs, etc..  The possibilities are endless!  I'm not saying stick your 2 year old in front of the computer daily and let them loose.  But I think a few minutes here and there, a few times a week would be a fun activity for a little learning toddler.  A word of advice, though...Make sure you do the search prior to showing your child.  Even though you think what you're typing in is completely innocent, you never know what disturbing photo could pop up.

Have fun Googling and ogling all the fun pictures you find!

Saturday, April 28, 2012

Ladybugs on the Loose!

We have some vegetables growing in our backyard: green beans, cucumber, broccoli, tomatoes, basil, yellow squash, peppers, and more!  Sounds delicious, right?  Well, the bugs think so, too, and they are eating away at all my delicious vegetable plants!  So, a few days ago we took a trip to our local plant nursery and purchased a container of ladybugs.  For $7.99, you get 1,500+ ladybugs, ready to take on all the pests in your garden!  Well, I had the container sitting on the kitchen counter (we were waiting to release them later in the evening).  In comes my wild child, knocks the container off the counter, pulls off the lid and lets at least 150 ladybugs loose in the kitchen!  Luckily, they didn't try to fly away and we were able to collect most of them.  We have 4 cats, so let's just say that they took care of any ladybugs we missed.  I'm so sorry little ladybugs! :(

Anyways, we were able to release the majority of the little red beetles into our garden, which made for an awesome nature observation experience for Olive (as if 150 ladybugs crawling on the kitchen floor wasn't enough).  She helped me spread them about our garden, allowing them to all find their new homes.  Then we spent about 20 minutes just watching them.  Listening to Olive exclaim, "Ohhhh", "Ahhhh", "Oooooh, nice!", "Oh, bugbug!", was so precious and memorable.

Making friends...

Up close and personal.


"Ohhhhh!  Bugbug!  Nice!"


I love these next 4 pictures.  They show such a great progression of feelings.
"Hmmm, this is interesting, but I'm not too sure yet".

"Oh yes, I think I like this!"

"Okay now ladybug, you're getting a little too close.  You aren't going to go up my sleeve, are you?"

"OMG!  She's on my shoulder!  Be still, be still!"


We had such a pleasant time watching the little ladybugs crawl and fly around us.  Even if you don't have aphids or other unpleasant bugs in your garden, I highly recommend picking up a container of ladybugs.  Set them loose and watch your little one burst with excitement!  Just remember to release them outdoors, not in the kitchen.  :)

Friday, April 13, 2012

One Little Monkey Jumping on the Bed!

We had a dreary, rainy day today.  Not so bad on its own, but I woke up with a nasty cold and was not in the mood for anything.  After a few hours of laying on the floor and reading books here and there, Olive was starting to get on my last nerve get very rambunctious.  Since we couldn't go outside, I made a little bounce house in my living room.  I moved the coffee tables out of the room, grabbed my daughter's crib mattress, threw it on the floor, and lined it with pillows.  Then I resumed my position on the floor - wrapped in a blanket and sipping tea - and let her go at it.

...and go at it she did!


At some point, she decided that the mattress should be flipped over.  She looks like she's in pain, but she's really just being dramatic.  Don't worry, I wouldn't let her give herself a hernia.  :)


I swear, sometimes I think she's secretly practicing to enter the World's Strongest Baby Competition.  She'll walk over with something she clearly should not be carrying while saying, "Heavy!  Heavy!".  


I definitely give this "indoor excess energy activity" 5 Stars!  The best activities are: simple, free, open-ended, and use things you already have on hand.  Mattress jumping definitely fits all those categories!

I hope you all have a fun weekend and maybe let your little monkey jump on the bed!

Monday, April 2, 2012

10 Ways to Play with Push Lights

I found these fun little push lights at The Dollar Tree, my absolute favorite place.  I'll be honest, you can probably find better quality ones somewhere else, but you'll end up spending more than $1 I'm sure.  Each of these take 4 AA batteries and The Dollar Tree sells packs of 8 batteries for $1.  Score!


I love these lights because they're simple, produce a good amount of light, and are easy for a little toddler to turn on and off.  Olive loves them for all the same reasons.  We haven't really played anything specific with them yet except for just turning them on and off.  They are equally fun in the light as well as dark.


Even though we haven't used them (yet) in all these ways, here are some different ideas on how you can use push lights (with your toddler or even an older child):

1) Learning words:  on, off, push, light, dark

2) Energetic game:  Set up about 10 in a room and turn them all on.  You run around pushing them all off and your child runs around pushing them all back on.  This game could literally go on forever.

3) Cozy reading:  Turn off all the lights and set a few of the push lights around you.  Read books together by the light of the pushlights.

4) Stop and Go:  Child is in charge of pushing light on and off.  When she pushes the light on, you move/crawl/jump/skip/etc. towards her.  When she pushes the light off, you have to stop.  When you reach her, switch places.

5) Middle of the night diaper changing light (okay, not exactly a "play" use, but helpful, right?)

6) Homemade light table:  Put a few push lights on the floor and place a clear bin upside down over the lights.  Voila!  Light table is ready to use!

7) Set a few on the floor and play with scarves and/or light fabrics over top to see the light diffused through the fabric.

8) Make a campfire:  Tape some orange construction paper to the outside edge of the light and cut into "flame" shapes.  Use as a "campfire" for dolls and play animals.

9) Practice gross motor/ hand-eye coordination skills:  Set up a few lights on the ground.  Have your child toss bean bags (heavy enough to turn on the light) and try to get the bean bags to land on the light and turn it on.

10) Feelings buttons:  If your child isn't talking yet and has trouble expressing her emotions... Take a few lights and draw a face (or tape a picture) to each one that reflects a different emotion - happy, sad, angry, tired, hungry, etc.  When your child is upset, you can show them to push the light that shows how they are feeling.  If they start to feel different, they can push the light off and push another light on that shows how they are feeling now.


Do any of you have push lights in your home?  What are some of the ways that you use them for play?

Thursday, March 29, 2012

Blocks and Beans

I thought about putting these into two different posts, but they're such simple ideas that I just decided to combine them.  These are great activities to do outdoors, but both can be done inside as well.   Up first....Blocks!

I found these wooden blocks a few weeks ago at my local lumber store (Ganahl Lumber).  They were being sold in a big bag labeled as "firewood" for $7.99.  I think there were about 30 blocks in the bag.  I started painting some of the blocks and then realized I should probably sand them first, so that's why some are painted and some are not.  In any case, I love these blocks!  They have so many possibilities.  I plan on going back and getting at least 2 more bags full.  Olive and I have used them to build towers, create corrals for her animals, and on this day - create a movable and repositionable balance beam.

Olive is a climber, a reacher, a jumper, a stretcher, a mover, and a shaker.  She has such strength and coordination and I am constantly looking for new ways to challenge her.  The blocks are great because we can move them around and create new paths to follow or even make little steps that she has to walk over.

  I tried to hold her hand as she followed the path of blocks but she kept yelling, "I do it!  I do it!".  Okay, okay, girlfriend, simmer down.  You can do it.  :)


Success!


I love those strong little legs!


Okay, moving onto...Beans!

No, I'm not the first one who thought of playing with dried beans.  But they are such an amazing and simple activity, I can't resist sharing!  Sometimes we play with beans inside, but today we took them outside so she could play near her new outdoor kitchen (which is really just an old TV cabinet that I've yet to "cuteify").  I have a mixture of beans in her box:  garbanzo, kidney, white & lentils.

Daddy got into the mix for a little while (in the middle of finishing up Olive's new light table - post coming soon, I hope!).  


Things you need to play with beans:  Beans, beans, and oh yeah, more beans.  But if you want to make it more fun, add some cupcake tins, pans, spoons, colanders, bowls, and other miscellaneous containers.  Also, I bought this outdoor carpet square for $20 at Lowe's a while back and it was so helpful.  I was able to sweep up all the beans without having them mixed in with leaves and dirt.  


When I told Olive we were going to play outside with the beans, she insisted on bringing out her chair. Everyone sits on a chair in front of their stove, right?  I love how she confidently makes her own decisions now.  She's getting to be such a big girl!


Blocks and beans - 2 simple ideas for fun outdoor play.  What are some of your simple outdoor play ideas?

Friday, March 23, 2012

Painting a Smile

I follow a really fabulous blog called NurtureStore.  They are a group based in the UK that posts tons of great play, art, and learning ideas for kids and toddlers.  From time to time they will have a "Kids Art Explorers" challenge and the challenge for this month is "No Paintbrushes Allowed!".  As a teacher, I've had my students paint with lots of different non-brush materials, but Olive hasn't had a lot of experience with it.  I though I would take them up on their challenge, and here's what I came up with:


I took a brown grocery bag and cut it open, but any paper/surface would have worked.  I drew 3 faces on the paper that had teeth.  If you have older children, they can do this themselves.

I got out 3 old toothbrushes that I had been saving for such an occasion - 2 regular ones and one electric toothbrush.  I let Olive pick 3 colors from my box of tempera paint.  She picked red, yellow, and green.  (In my head I was thinking, "Red and green?  Oh that's going to create a brown mess!".  But it really didn't and in the end, it wouldn't have mattered.  This activity was more about the process, less about the product.)


Normally, I'll just let her go to do her own thing when we paint, but for this time I did give her a little guidance.  I suggested that she "brush their teeth".  She did it a few times, but didn't limit herself.  Again, it didn't really matter - she was having fun no matter where the paint ended up.


She was in a really "interesting" mood when we did this.  Most times when we paint, she moves all of the paper, covering the whole thing as well as herself.  This time, she was very delicate with her movements and didn't cover a whole lot of the paper.  I'm wondering if it is because I had her in her high chair?  Normally we're on the ground, free to move.  Maybe she felt like because she was tied in,  her movements should be, too.  Who knows!


The finished product.  


Have fun finding unique items for your little one to play with!

Click here to join the project!

Tuesday, March 6, 2012

Bathtime for Baby

Let me just start by saying that this is not just a girl activity.  It is for any and all kids.  I have a real issue with people labeling activities and toys as specifically girl or boy.  All kids should be exposed to all kinds of toys.  You are doing a disservice to your child if you avoid letting them play with a toy or participate in an activity because it is labeled as something for the opposite gender.  Okay, I could go on for a long time about this, but I'll save it for another post!

Dolls and baby dolls are great for kids.  They can help with developing nurturing behavior as well as practical life and hygiene skills.  Olive has a few dolls but she didn't have any that were fully water safe.  I found this soft plastic baby at Kmart for $10.  It isn't the cutest one I saw, but it was definitely the best deal, and it does the job.  I pulled out Olive's old baby blow-up tub, grabbed a washcloth, water cup, and a little bottle of "soap" (it was really a small lotion bottle that she couldn't open).   I wanted to do this with real water and soap, but it was just too cold on this day.  I plan on taking the activity outside on a warmer day, using real soap and water.

I didn't really tell her what to do.  I showed her the things I had brought out and then just let her go.  She started by washing the baby's head.


Apparently, it was easier if she got in the tub, too.  When she got in, I had this moment of, "Woah, my little girl is huge!".  I remember when she was small enough to lie down in there.  Time sure does fly fast, it's crazy....


Wrapping the baby up and "drying" it off.  She kept saying, "Toesy, toesy" which is how she says 'cozy'.  


After she washed her baby, she went around the room and gathered other stuff animals and dolls to wash.  This was about a week ago and I've kept the duck bath out for her to use.  From time to time, she'll get it and give something in the room a good "wash" and then go back to whatever else she was doing.   I can't wait until we have a warm day so we can do this outside with real water!

Monday, February 27, 2012

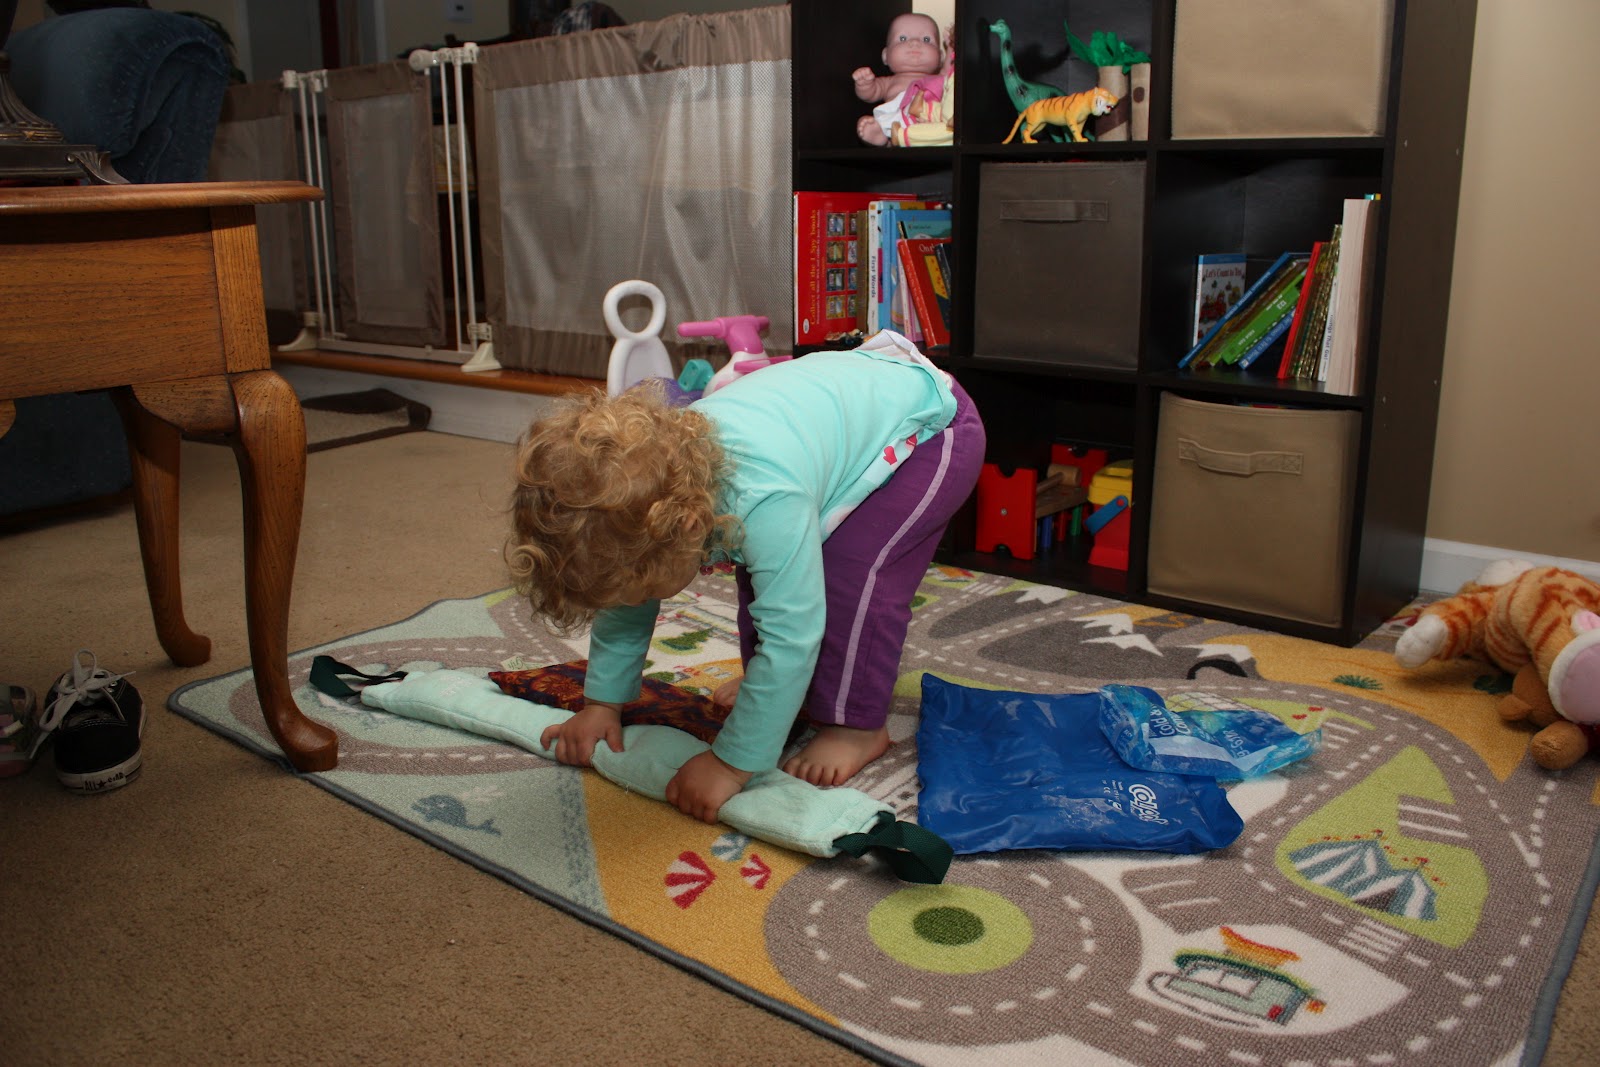
Sensory Play: Hot & Cold

This is a great activity for many reasons:  learn vocabulary "hot" and "cold", discover the difference between the two, and have a temperature sensory experience.  To be honest, the hot part of this activity isn't really hot, but more like quite warm, for obvious reasons.  Vocabulary ideas:  hot, warm, cozy, cold, cool, freezing, icy.

Things you need:  hot items and cold items.  I used gel-filled ice packs (they stay squishy when frozen) and rice-filled heat bags.  Use the ice packs straight from the freezer and warm the heat bags in the microwave.  Be careful not to get the heat bags too hot!


What to do:  Place your hot and cold items on the floor and let your little one explore.  It's as simple as that!  I've done this activity before with Olive, but the first time we did it, I just let her feel around for about 5 minutes.  After she had done some sensory exploring, I started talking with her.  "Oh, this is cold!  Is that one warm?  Ooohh, that feels nice and cozy!  Should we put the cold one on our feet?  Oh boy, it's freezing!" and so on.

Like with any sensory activity, try not to push them.  It's really all about exploring.  If they seem like they need help, you can guide them, but try to leave them to discover things on their own.  Even from the first time we did this, Olive chose - on her own - to step on the items and lay on them.

Feeling the cold

Feeling the hot/warm

Laying on the hot/warm

Laying on the cold

Everything still goes in the mouth!  Ay yai yai!


Friday, January 27, 2012

Making Soup...and More Pretending

When my daughter was younger, I remember really looking forward to the day where she could pretend with me.  When I was working as a teacher, I was the teacher who would pass out strips of paper and say, "Let's figure out what it could be, what we could do with it!".  Sure, I got a lot of eye rolls, but I also got a lot of creative thinkers.  The art of pretending is really a skill that comes with age, and I would say that age for Olive was about 17 months.  Around that time was when she really started playing "pretend":  pouring tea for her dollies, eating imaginary food with a fork, driving a cardboard car, and more.

I love, love, love pretending with Olive for a lot of reasons, but 2 main reasons really:  1) When you pretend, you can go anywhere, be anyone, and do anything and 2) it doesn't cost anything.  Let's face it, if necessity is the mother of invention, than an empty wallet is the mother of pretend play.

One of Olive's favorite pretend things to do (and by favorite, I mean that it's an activity that she can focus on for more than 15 minutes) is "making soup".


Sprinkling some "spice" into her soup bowl.


Opening a pill box to retrieve some "ingredients" to add to the soup.


Of course, every good cook always tastes their food.


Making soup isn't the only way we pretend around our house.  Here are some other things we have that we pretend with:


  • Old corded telephone
  • Calculator
  • Table setting (place mat, plate, utensils, napkin, cup)
  • Dolls
  • Toy cars
  • Random plastic pieces
  • Scarves & hats
  • Teapot & teacups
Here's a short article I came across on the importance of play that I thought you might enjoy reading.

Olive and I hope you have a fun weekend filled with dancing like a bear, baking cookies in a shoebox, and having a phone conversation with a stuffed animal. :)

Saturday, January 21, 2012

Busy Boxes...Or Whatever You Want to Call Them!

Busy boxes.  Quiet time bins.  What do I do now? containers.  Whatever you want to call them, they all serve the same purpose.  I initially came across this idea at The View from 5'5" and I was in love at first sight!  The original idea is that these boxes will serve as "quiet" activities for the littles during times of the day where quiet is needed:  during a naptime that is transitioning into awake time, during the time before nap, during the time before bed, etc.  However, I am using it for a different purpose.

My daughter is 20 months old and always looking for something new to do.  Frankly, I often run out of ideas.  I mean, I can only color, play with HotWheels cars, roll on the rug, and make her dollies dance for so long.  I came across the quiet time bins idea and thought, "Bingo!".   When I can't think of something to do, I will just go to her Busy Box of the day and pick an activity to do!  Initially, I tried to incorporate 5 categories into each box:  Practical Life, Learning, Fine Motor, Creative Play, Problem Solving.  As I put the boxes together, it was taking me forever to decide on all 5 categories for each box so I figured, hey, I'll just put at least 4 categories in each box!  For reference, the majority of materials I had on hand at home.  If I didn't have something I wanted, I purchased it from The Dollar Tree.  In the end, I probably spent about $12 to create these boxes (I purchased the actual bins from The Dollar Tree, too!).  Also, I came up with some ideas on my own and some ideas were gathered elsewhere.  If I got the idea from someone else, I've provided a link, so just click on it!  So, without further adieu.....

I have a bin for each day, Monday through Friday.  If I am ever at a lull point in the day, I will reach for that day's bin and pick an activity to do.  By the way, I keep these bins out of my daughter's play area.


MONDAY'S BIN:
2 washcloths for folding practice, first words flashcards, stamps & stamp pads, a puzzle, Coke bottle game (she won't get it, but it will be good for fine motor practice).

TUESDAY'S BIN:
Color matching felt squares (she has colored blocks that we can organize according to color), spaghetti noodles in a cheese shaker jar (for fine motor skill practice), hot glue crayon rubbing plates,  table setting (cup, fork, spoon, napkin, plate, place mat)


WEDNESDAY'S BIN:
Tinfoil (just for creative fun), hygiene kit (brush, loofah, toothpaste - hot glued shut, toothbrush) for practical life play, shape flashcards, puzzle, clothespins (for fine motor - to pin on edge of Tupperware container)


THURSDAY'S BIN:
Peg board strip & golf tees (fine motor), felt shape pieces, child safe scissors (only cut paper) with a magazine (to practice cutting), Etch-A-Sketch


FRIDAY'S BIN:
Color flashcards, mini containers of playdoh, flowers for flower vase arranging, pom poms with a spoon (transferring from one bin to another for fine motor practice)


After a month, I plan on switching out some of the activities to add some newness/variety.  I haven't yet used these with Olive, but I think she will like it.  Given that she only gets to see each activity once a week, I think that it will help to keep her attention longer than a normal everyday activity might.